Getting Started:
After the modeling utility of your choice is installed, the best way to start is to painstakingly follow the tutorials. Miscellaneous meritorious modeling tutorials can be found at Wavelength.
Decompiling .mdl files
The file that is used by Half-Life for monsters and weapons is the mdl file. Unfortunately, MS3D uses the ms3d and smd file for editing purposes. Here are the
steps necessary in order to decompile a Half-Life monster or weapon model for editing.
1. Extract the model you wish to use as a base from the pak0.pak into its own folder (e.g. My Documents/mymodel).
2. In Milkshape 3D, click Tools>>Half-Life>>Decompile Normal HL MDL File. Navigate to
your chosen model.
3. Check all the boxes that apply, Reference being the actual model, Sequences the animations, Textures the textures used, and the all important .QC file what controls the model's recompilation.
4. In the model's folder, dozens of new files will be created. To view the
decompiled model in MS3D for editing, click File>>Import>>Half-Life SMD. There will be many smds to choose from in your directory. One is the reference model, and the rest are animations. Navigate to the smd file with 'reference' or 'ref' in its name and click okay. You are now free to edit
and observe, learning the modeling strategies of the professionals. Replacing a Weapon Model
Once you are comfortable with the ins and outs of Milkshape 3D, it is time to actually go through the long process of making a model capable of replacing an
existing one.
1. Decide which weapon you wish to replace. In this tutorial I will replace the v_crowbar.
2. Import the crowbar reference smd. Delete the crowbar polygons and create a new melee weapon in the same place.
3. Texture the new weapon and assign the vertices to the same joint that the
original crowbar was assigned to.
4. Now to compile the model to be used as a crowbar-replacement in-game. This part is tricky. Click File>>Export>>Half-Life SMD. Select a name for the .smd file (newcrowbar) and click okay.
5. Select 'reference' for SMD export, navigate to the model's
folder, and open the v_crowbar.qc file with notepad.
6. The qc file is an extremely powerful text file, controlling all aspects of the model. There will be many entries in the file. In the top lines, change the name of the end model from v_crowbar.mdl to v_newcrowbar.mdl.
7. Scroll down to where
it says:
$bodygroup studio
{
studio "crowbar_reference"
}
This is where the reference smd file is defined. Replace "crowbar_reference" with the name of the reference smd you recently exported (newcrowbar).
8. Below this all the animations are defined. Nothing really needs to be changed here. Save the qc file as
newcrowbar.qc
9. Go back into Milkshape. Click Tools>>Half-Life>>Compile QC File. Navigate to the newcrowbar.qc you recently created and click okay. If there are no errors, a v_newcrowbar.mdl will be created in the same folder as the smds. If there are errors that halt the compilation,
you may not be using 256-color bitmaps. Also, make sure that all hit box definitions in the QC must have corresponding joints in the smd with vertices assigned. If you do not wish to use a joint, simply remove its hit-box definition from the QC.
Replacing a
Monster Model
The most advanced yet also most rewarding type of model-replacement is the use of custom monster models. The Sven Co-op Model- Replacement technology is powerful enough to drastically change the way a monster encounters the player. Prepare for a lengthy but enlightening procedure.
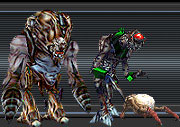
1. Decide which monster you wish to replace. In this tutorial I will replace the alien_slave with a dragonman, as done in svencooprpg2.
2. Import the alien_slave smd. Delete the existing Slave polygons and create a new monster in the same place or edit the existing model.
3.
Texture the new monster and assign the vertices to the same joints that the original body-parts were assigned to.
4. Now to compile the model to be used as an alien_slave in-game. Click File>>Export>>Half-Life SMD. Select a name for the .smd file (dragonman) and click okay.
5. Select
'reference' for SMD export, navigate to the model's folder, and open the slave.qc file with notepad.
6. The QC file is an extremely powerful text file, controlling all aspects of the model. In the top lines, change the name of the end model from slave.mdl to dragonman.mdl.
7. Scroll down to the
hit-box entries, which begin with
// 20 hit boxes
In this list, the places where your model can be shot are defined in hexidecimal. Mastering custom creation of hit-boxes using hexidecimal code is an easy way to make your brain explode. Fortunately, if a model's hit-boxes are not assigned, Half-Life will make default
ones following the model's joints. It may be best to either delete all these entries or turn them into comments with a //. Thus they will not be taken into account during compilation but can be used again later on if needed.
8. Scroll down to where it says:
$bodygroup studio
{
studio "ISLAVE_Template_Model-1"
}
This is where the reference smd file is defined. Replace "ISLAVE_Template_Model-1" with the name of the reference smd you recently exported (dragonman).
9. Below this all the animations are defined. Many things may be altered here. If custom
animations have been created, they may be included here by replacing the smd name in parentheses. Also, the monster's movement and attack speed may be altered by increasing or decreasing the fps number. For example, to drastically increase the dragonman's run speed, you would replace
$sequence run1 "run1" LX loop fps 25 ACT_RUN 1
with
$sequence run1 "run1" LX loop fps 50 ACT_RUN 1
10. Unnecessary animations included with the original slave.mdl can be deleted to decrease the mdl file size. Many of the animations are only used in scripted_sequences, and if you don't plan on using these animations, it may be best to remove their definitions from the QC.
11.
Save the QC file as dragonman.qc
12. Go back into Milkshape. Click Tools>>Half-Life>>Compile QC File. Navigate to the dragonman.qc you recently created and click okay. If there are no errors, a dragonman.mdl will be created in the same folder as the smds. If there are errors that halt
the compilation, you may not be using 256-color bitmaps. Also keep in mind that all hit box definitions in the QC must have corresponding joints in the smd with vertices assigned. If you do not wish to use a joint, simply remove its hit-box definition from the QC.
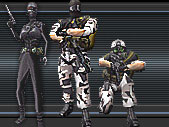
Important: when model_replacing the monster_human_grunt, one must make sure to export corresponding "head" smds for every human_grunt head and "gunreference" smds for both gun-types. If only one head or weapon smd is implemented in the qc file, Sven-Coop will crash a few moments after the monster spawns. Replacing a Monster Model: Advanced
Any monster created using the previous tutorials will use the same animations that the original monster uses. This is the easiest way to create a new monster, but ambitious mappers are by no means bound by Valve's animations. By creating new
animations and bone structure, the monster can look completely different from its original counterpart. Since hit-boxes are created where joints are, if the modeler wishes to create a monster larger or smaller than the original, a new bone-structure, and thus animations, must be created. Technically,
the only thing that has to remain the same between a monster and its replacement is the attack type. For example, a zombie would have to have a melee attack. However, if you want to restrict a monster's attack type, you can delete the unwanted attack animation definitions in the QC. For example, if you
did not want the alien_slave to have a zap attack and only wanted it to be able to punch the player, you can simply delete the line
$sequence zapattack1 "zapattack1" fps 15 ACT_RANGE_ATTACK1 1 { event 3 0 } { event 3 4 } { event 3 10 } { event 3 15 } { event 4 24 } { event 5 29 }
The possibilities are infinite. |